The default setting on iPhone camera is to save photos in HEIC format. In this article, we share the methods of saving photos taken by iPhone in JPG format by default and converting HEIC photos that have been taken to JPG.
Table of Contents
Method 1: Save as JPG when taking pictures
HEIC image files are generated when we shoot with the camera on iPhone, so the first suggested HEIC to JPG on iPhone method is to save the photos in JPG format when shooting.
Change photo HEIC format to JPG on iPhone:
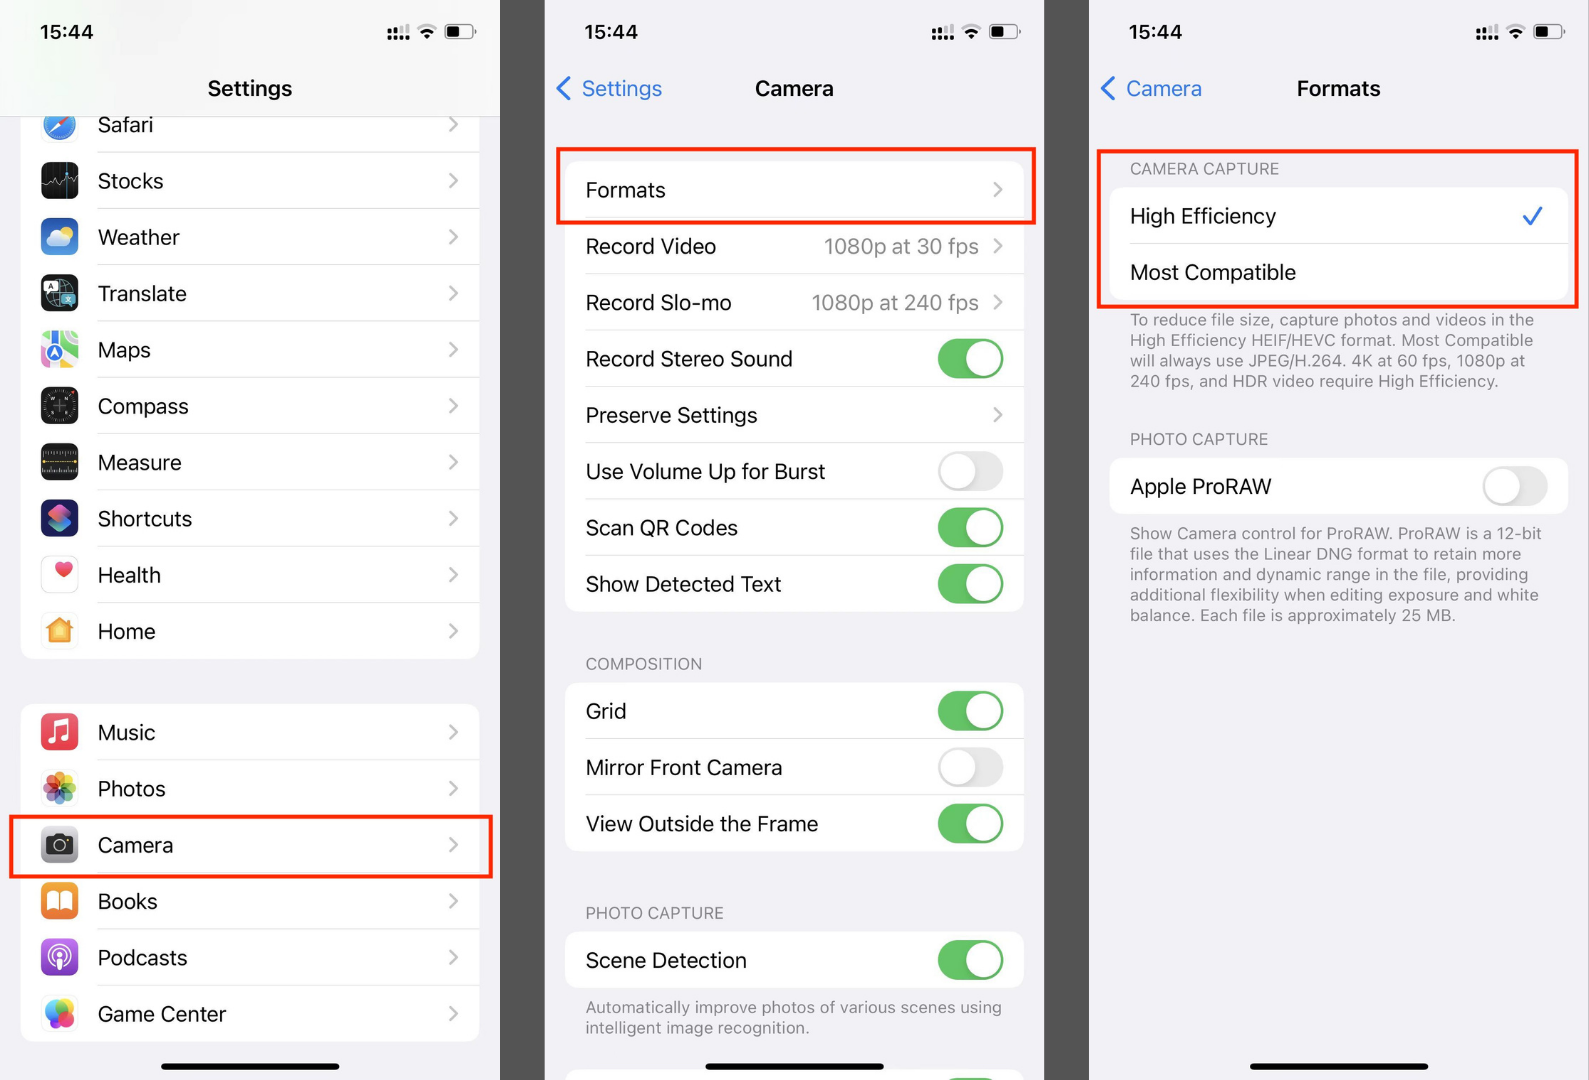
- go to “Settings” on your iPhone.
- Select “Camera”.
- Select “Format”.
- change High Efficiency to Most Compatible.
- After completing the settings, the photos taken again will be saved in JPG format.
Method 2: Using Free HEIC to JPG Online Converter
For the photos that have been taken, the HEIC files has been formed at this time. It can be viewed normally on the Mac system and iOS system under Apple’s ecosystem, but there are often incompatibilities when sharing to the Windows ecosystem.
So we need to convert HEIC to JPG format, it will be more convenient to use computer to operate. Check out these two articles on how to complete the conversion on your computer:
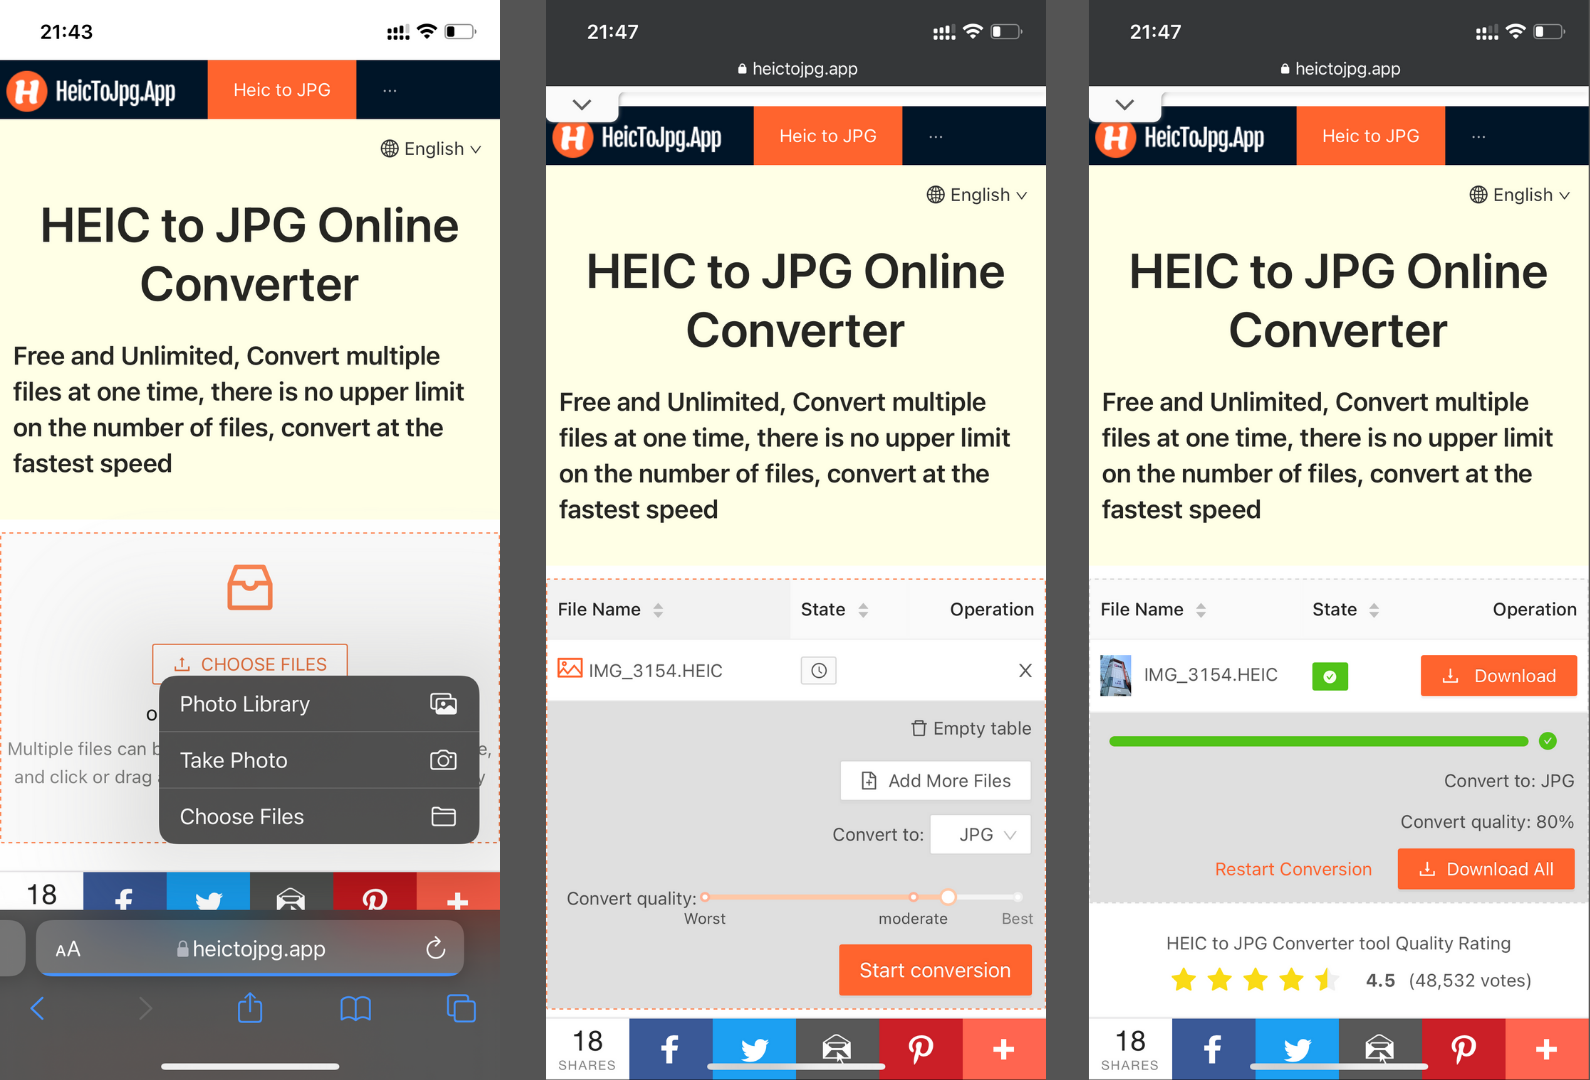
To Convert HEIC to JPG on iPhone, the first way we recommend is to Using an online HEIC to JPG converter:
- Open the website using your mobile browser : HeicToJPG.App
- Select the HEIC files from Photos or Files.
- Click the Start Conversion button.
- Conversion complete, save the converted JPG files to iPhone.
Method 3: Using Files app
Converting via the Files App is also a great way to go if you use iCloud.
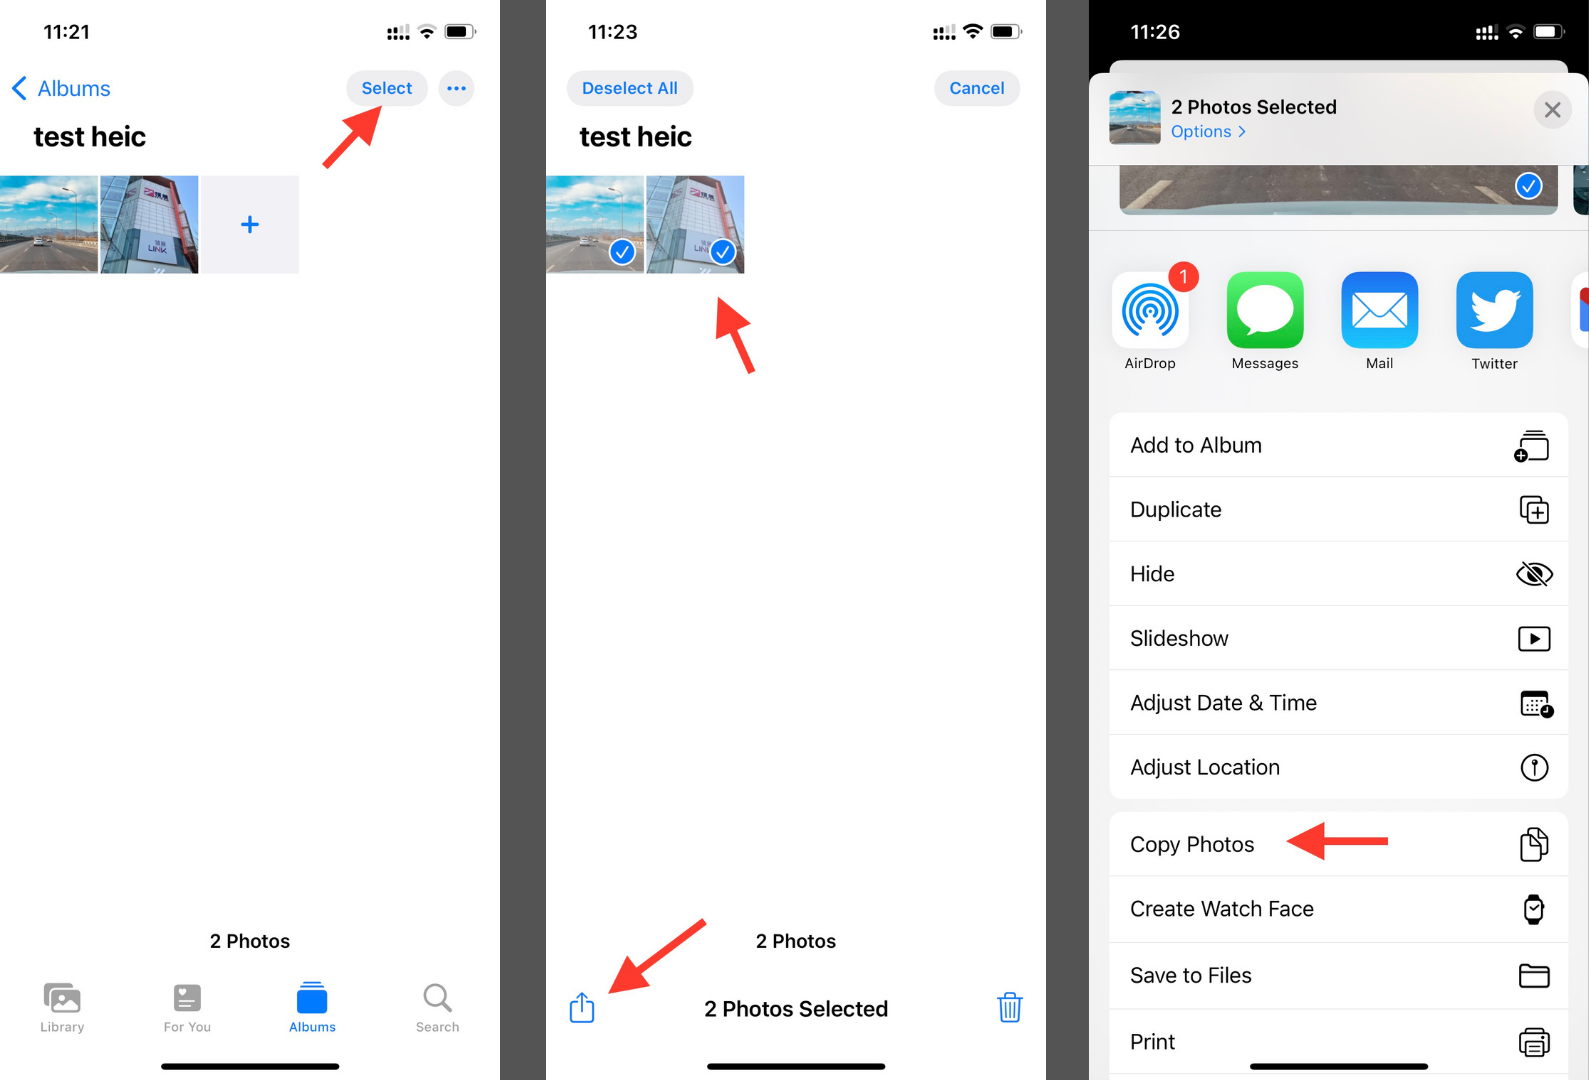
Using Files app to convert HEIC to JPG on iPhone:
- Click the “Select” button in the upper right corner of the screen.
- Click to select an image.
- Click the icon in the lower left corner of the screen.
- Tap “Copy Photos”.
- Open Files App.
- Long press the screen in the directory where you want to save the JPG file.
- Select Paste.
- At this point, the picture saved in files is already in JPG format.
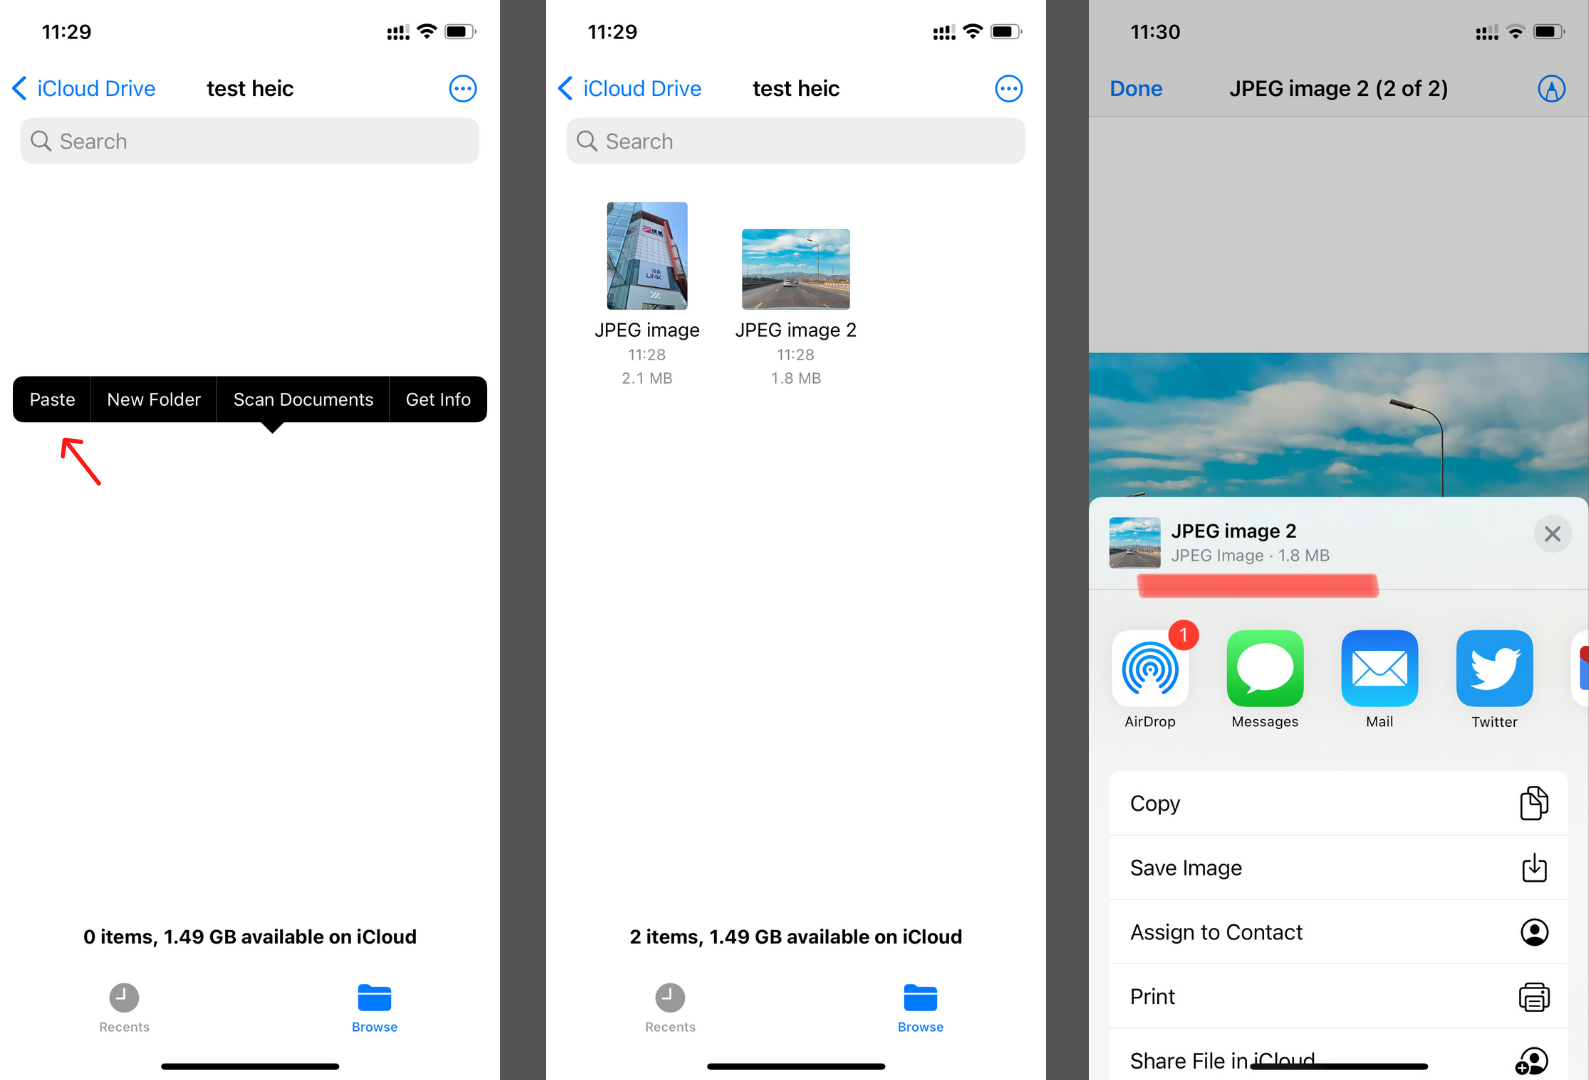
Through the automatic synchronization function of iCloud, we can easily use these JPG files on Mac or other devices.
Method 4: Using a third-party app
Using a third-party app to convert HEIC to JPG on iPhone:
- Search for HEIC to JPG in the App Store.
- Download and install a heic to jpg converter app.
- Select the file to convert through the app.
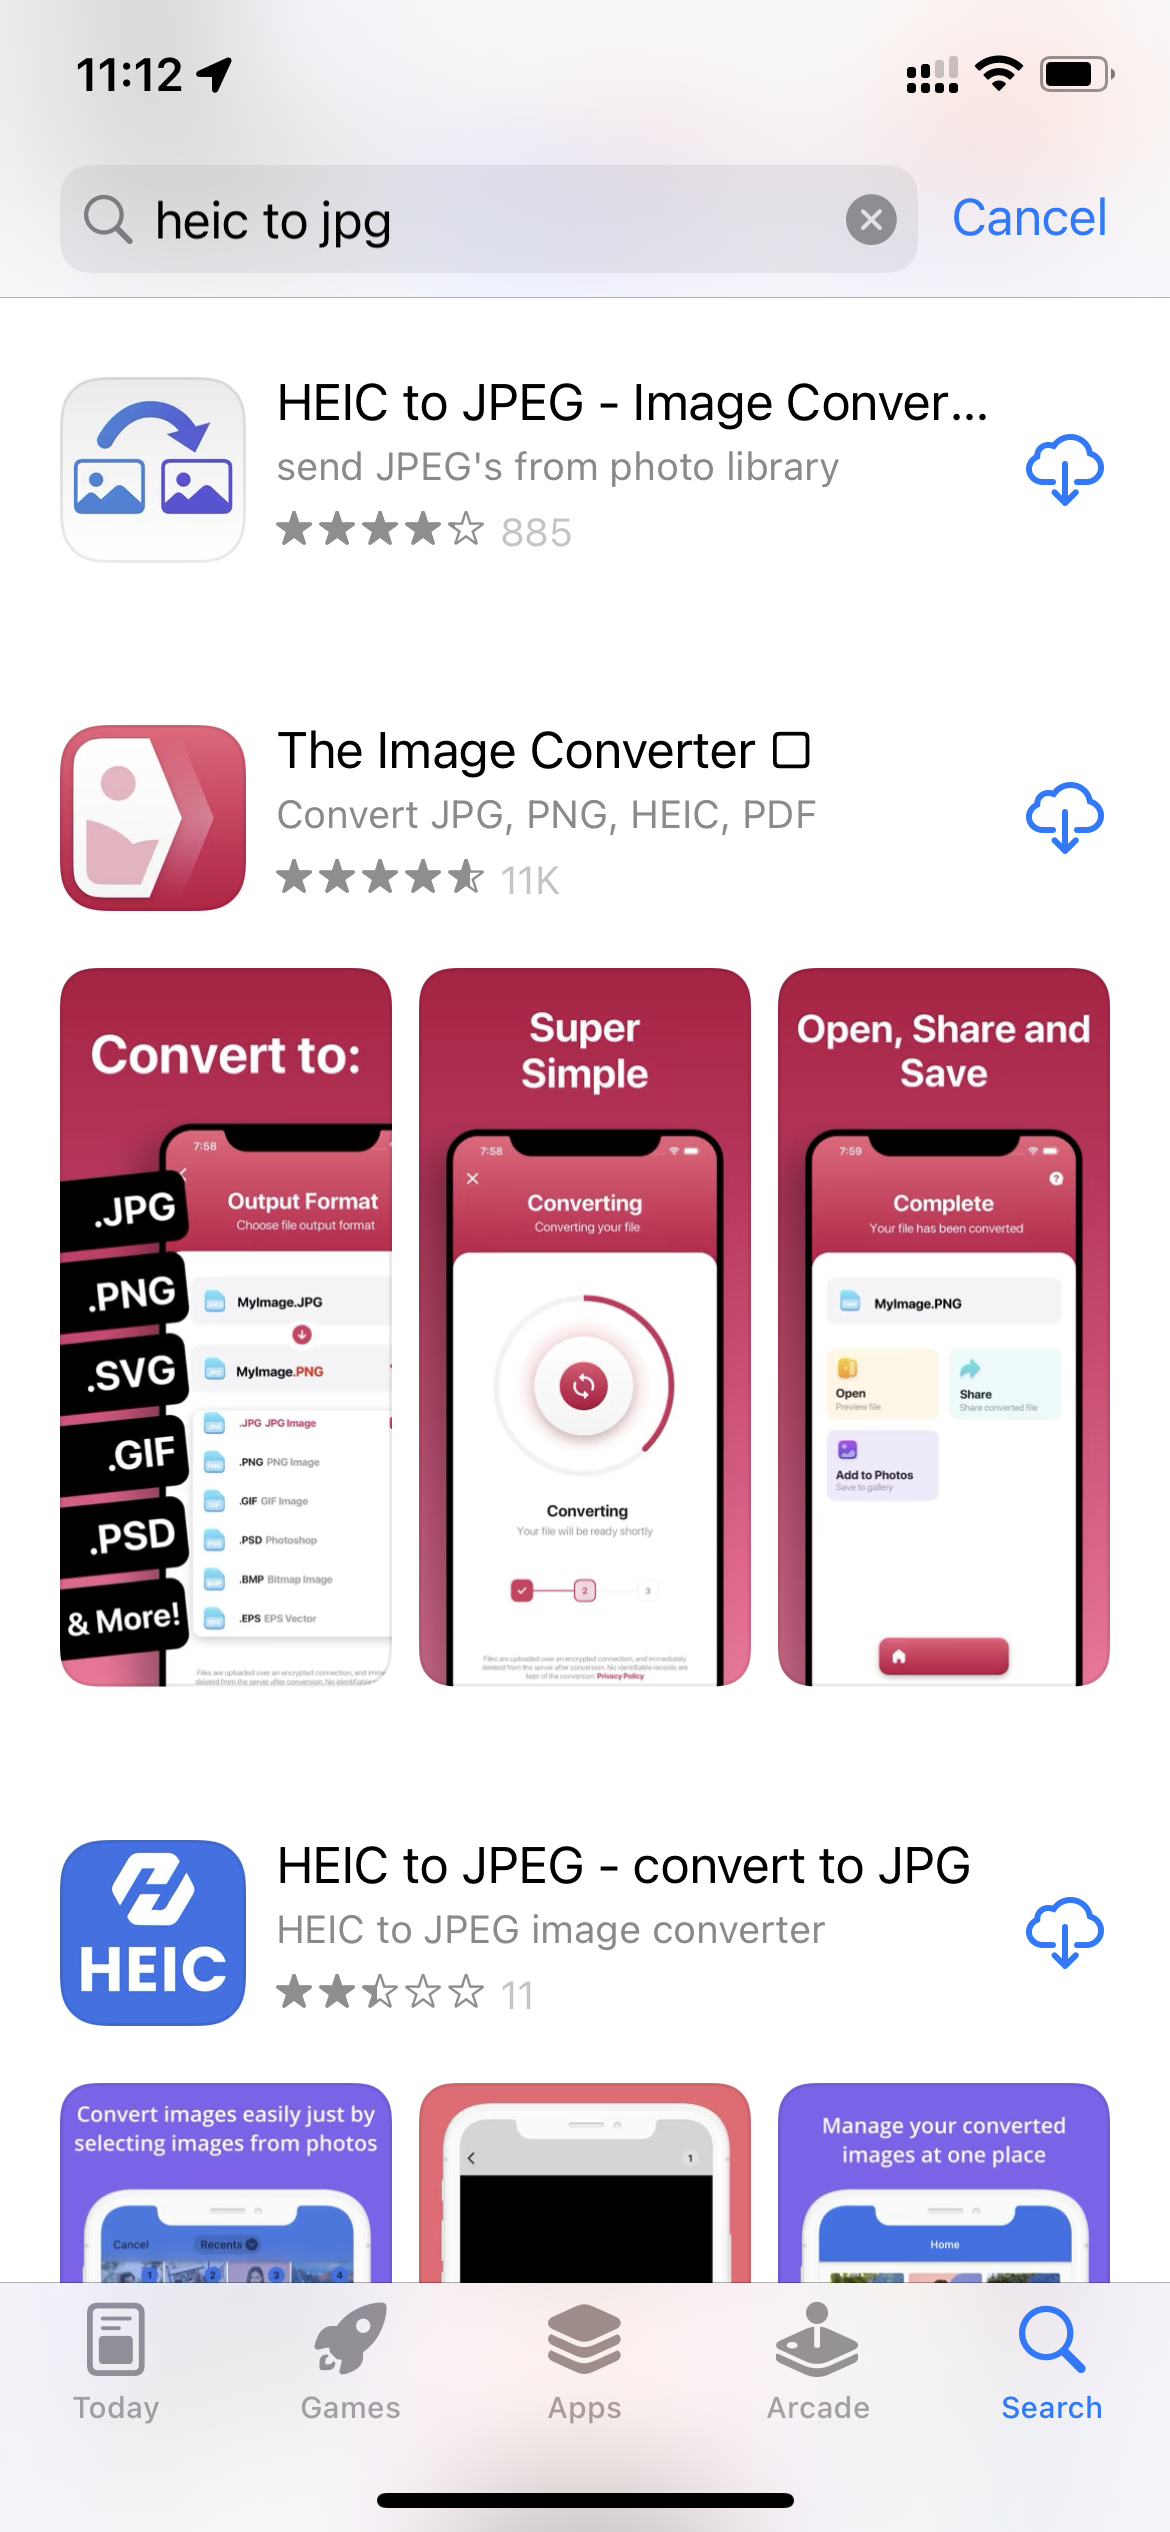
We really wanted to pick out a good and free unlimited heic to jpg converter app, but the bad news is that we tried dozens of apps and couldn’t find one that worked very well.
So I don’t recommend specific apps here. If you find any useful ones, please leave a message and let us know.